How to Make Easter Egg Dye from Kitchen Scraps

Your whole family will love making DIY Easter eggs using kitchen scraps like beets, red cabbage, parsley, turmeric, and tea. These homemade Easter eggs are great if you’re looking for a fun kitchen project, if you have allergies or concerns about ingredients in store-bought dye, or if you forgot to buy a dye kit!
Dyeing Easter eggs is a tradition that I have loved since I was a little kid. Even as an adult, there’s just something about lowering a pristine, white egg into the cup of dye and watching it transform into a jewel-toned nugget that never fails to make me smile.
While egg dying kits are convenient, I also love experimenting with making my own natural Easter egg dye from common kitchen items. It’s a fun project, and the results were spectacular! Plus it’s great it you forgot to buy a dye kit or the stores are sold out.
If you’re anything like me, which since you’re here, we already have a few things in common — our love for food and the desire to put our health at the forefront — you may have been dabbling at the idea of naturally dyeing Easter eggs.
DIY Easter eggs are a great activity to do if you’re feeling a little creative, especially if you don’t mind getting a little messy and experimenting with colors. But it can be a bit intimidating learning what foods to use to produce different colors.
Honestly, I think the part that steers people away from homemade Easter egg dye is:
- They think it will take too long — you really only need 30 minutes to an hour.
- They don’t know which foods will create beautifully dyed eggs. Some of them might surprise you!
So, I’ve taken the hard part out of experimenting for you. I’ve tried numerous techniques and have found the best foods to use to create a beautiful array of Easter eggs to use for your Sunday brunch.
If you have leftovers, you can also use these eggs in other recipes. Cobb salad or Scotch eggs anyone? And if you’re looking for healthy treats for your Easter basket, you can make healthy peanut butter eggs that taste just like Reese’s!
DIY Easter Egg Dye
To get started, you’ll need:
- Water
- Hard-boiled eggs
- Beets
- Red cabbage
- Turmeric
- Hibiscus tea
- Parsley
- Vegetable oil, optional, for rubbing eggs after coloring
How to Make Easter Egg Dye
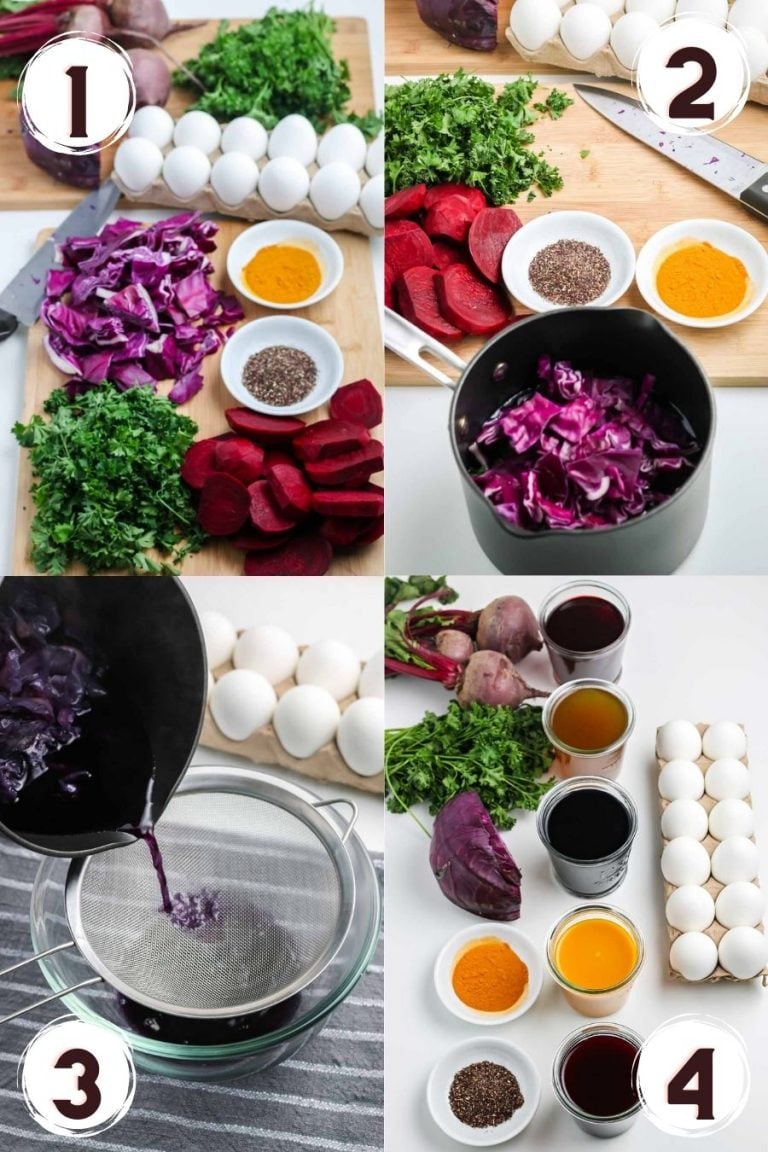
Everyone has their own method of how to get the best color out of plant-based dyes. Over the years, I’ve found that the best way for me to dye Easter eggs and still have fun with them is to eyeball my colors.
I add them to a pot with one or two cups of water and let them boil for 15-30 minutes, basically until the dye is a few shades darker than the color I want my eggs to be.
Pro Tip: If you want your colors to be darker, let them boil a bit longer, if you want your eggs to be lighter in color, take the dye off the heat sooner.
You can dye the eggs right in the pot, or transfer the dye to custard cups, tea cups, or small rammekins if you have multiple people dying eggs and don’t want to share.
Once the dye has cooled, stir in some white vinegar before adding the eggs. The acidic vinegar reacts with the calcium in the egg shell to help the dye stick, resulting in bright, vibrant eggs.
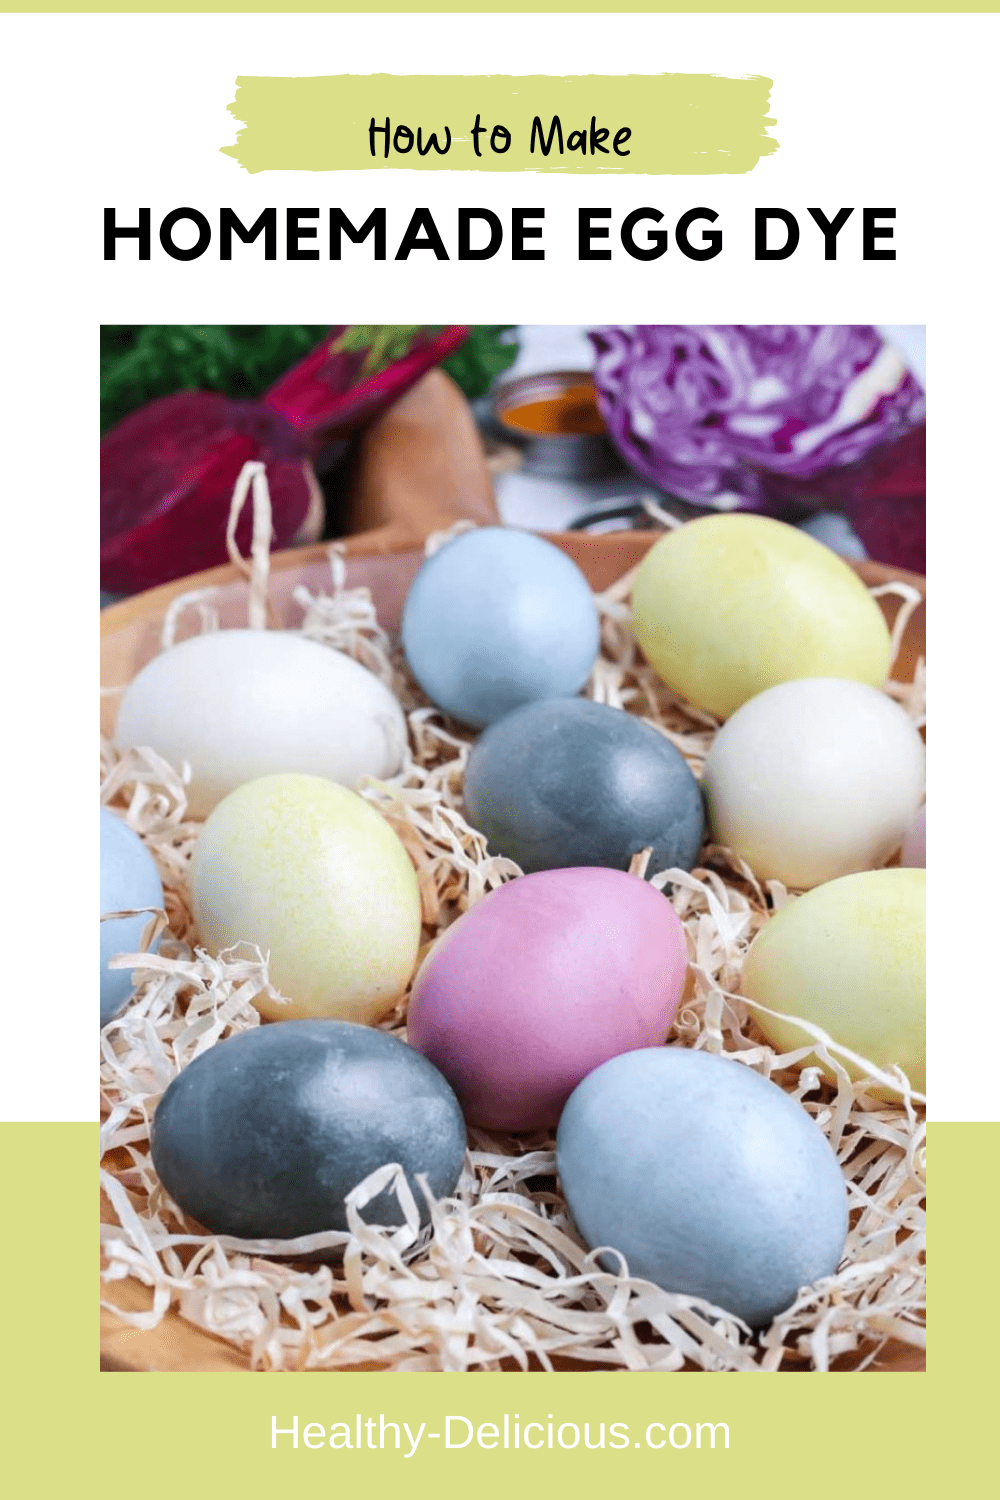
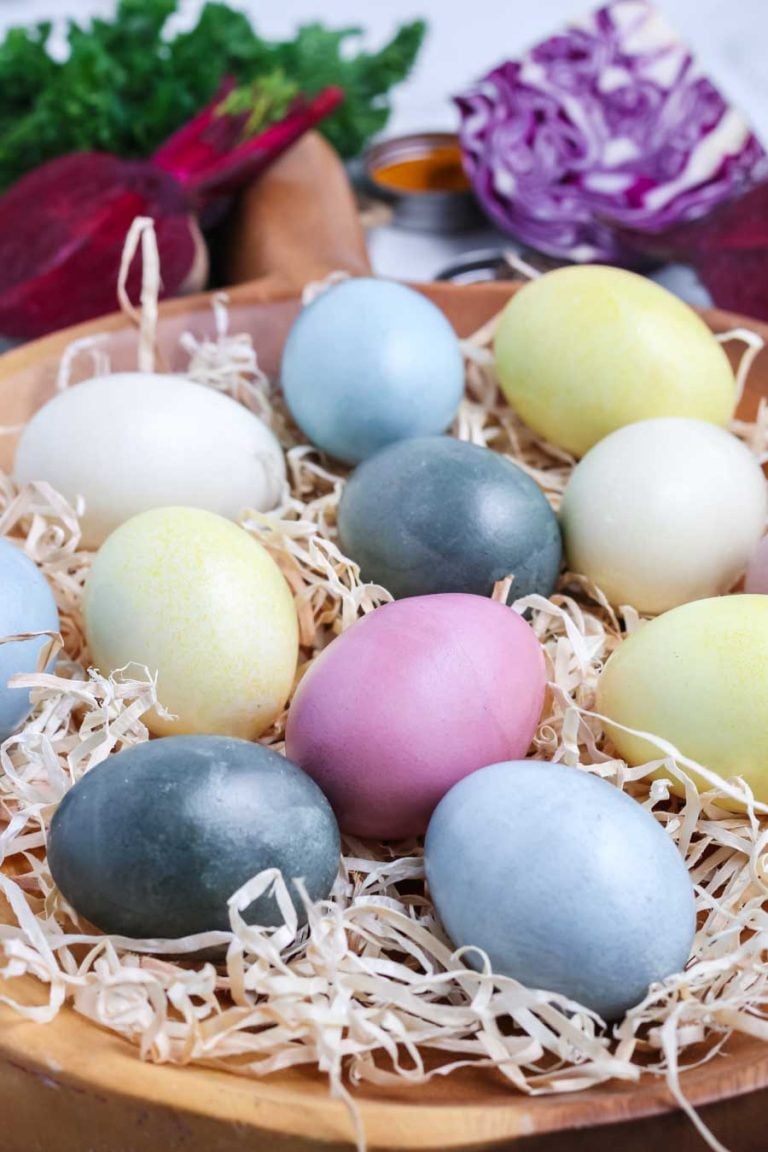
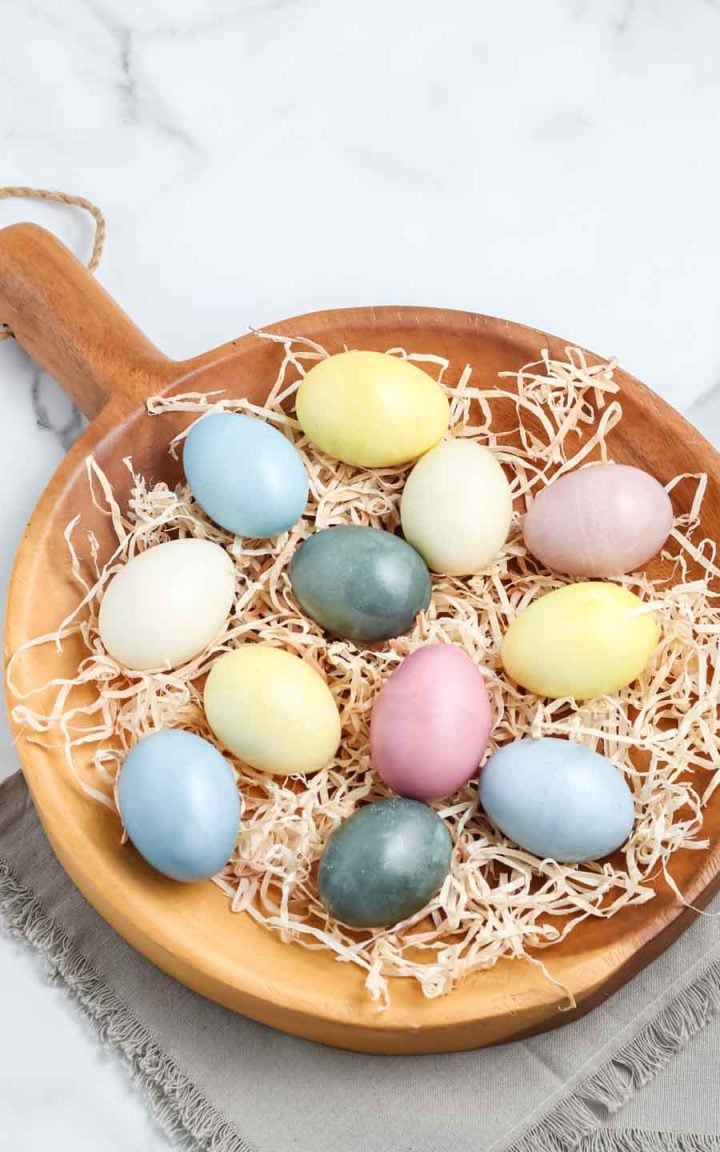
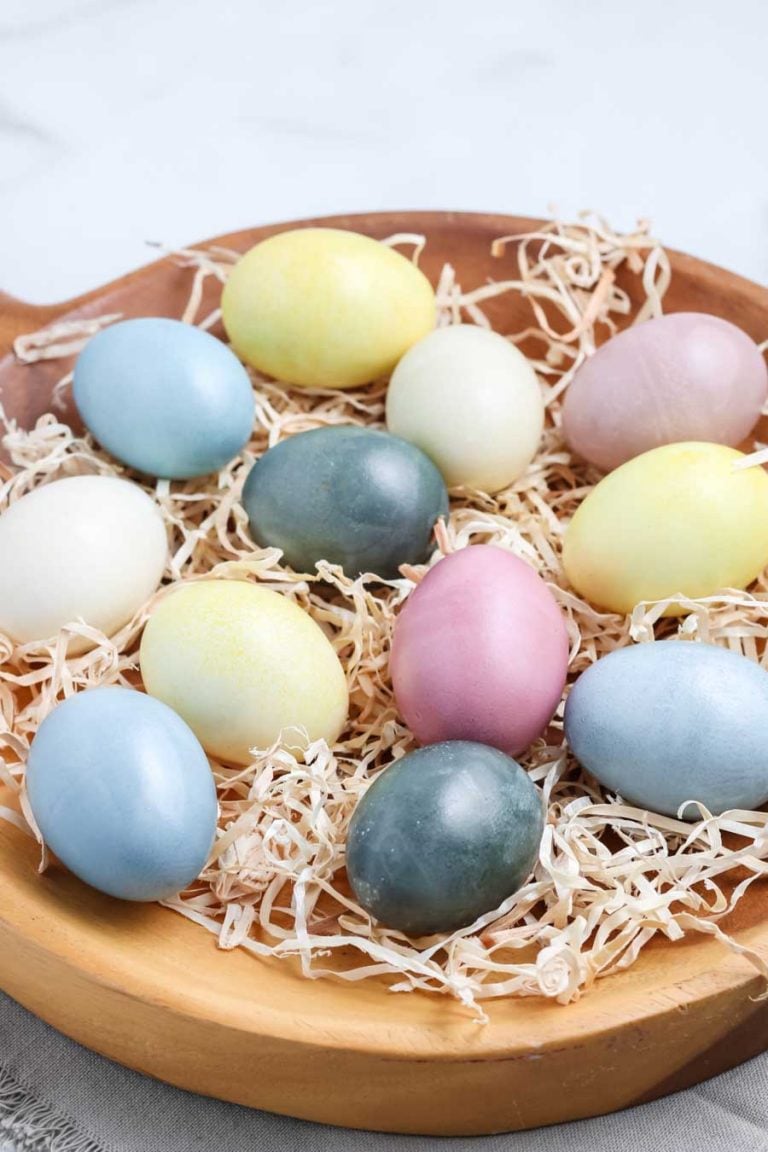
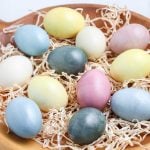
Natural Easter Egg Dye Colors
So, what kitchen items will you need to make your favorite color dye? The answer might surprise you!
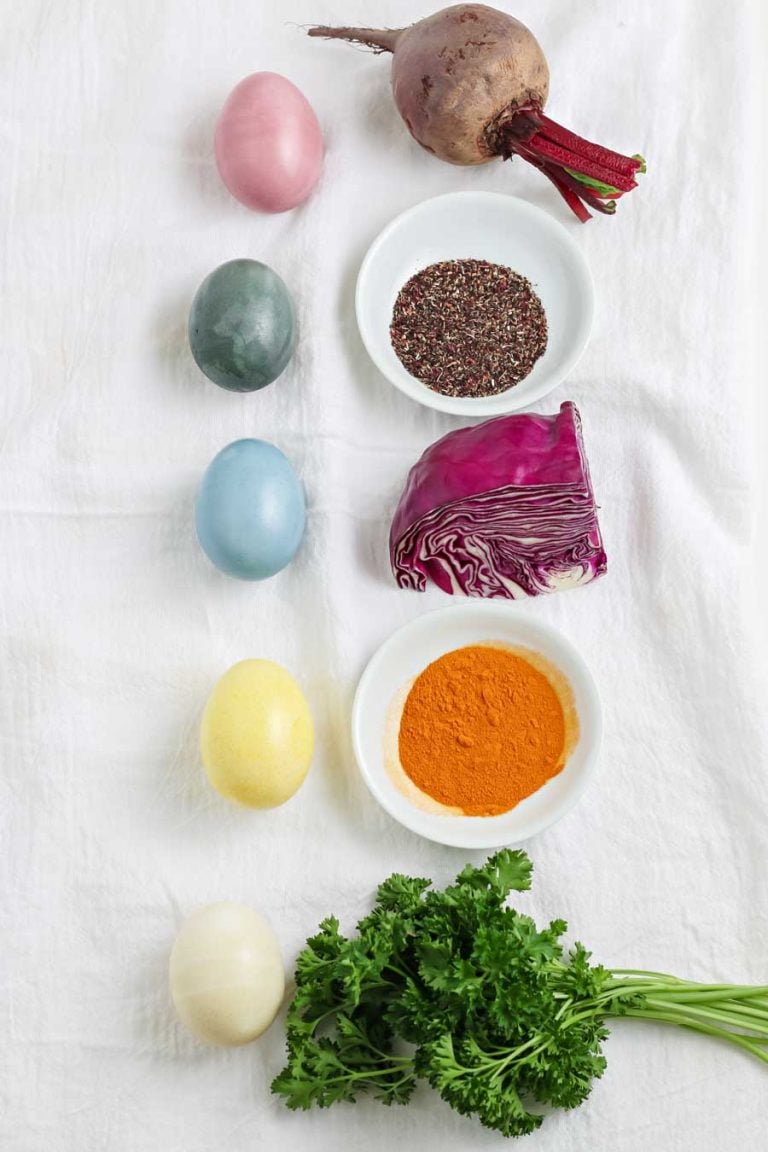
- For tan dye use fresh herbs like parsley or cilantro
- For yellow, use turmeric. You can also add a few onion peels for a brighter yellow color
- For a pretty birds-egg blue dye, use red cabbage
- For a stone-like grey, hibiscus tea is what you’re looking for
- For pink eggs, use beets. Fresh beetroot will give you a soft pink, while beet juice will give your a deep fuscia! (Use the juice from a can of beets, and use the beets themselves to make beet hummus)
You can also layer the colors for more options!
An egg that’s dyed yellow and then blue will turn green. Or dye an egg yellow and then pink to make orange.
I also love wrapping a rubber band or some tape around the egg before dropping it into the dye to make stripes. Be sure the dye dries completely before removing the barrier.
You can also use a white crayon to draw on the egg shell. The wax will repel the dye, leaving a white design behind.
Tips for Naturally Dyeing Easter Eggs
- Natural dyes are nothing like store-bought Easter egg kits, every egg dipped in the same colored dye may come out a different shade. But that’s the fun of dyeing Easter eggs! You get to create unique colors and creations; no two eggs are the same.
- Let the dye cool completely before adding your eggs. Otherwise, the hot dye can cook them. No one liked overcooked boiled eggs!
- If you want a richer color, let your eggs soak in the refrigerator overnight. The eggs we dipped in the parsley dye, for example, were very light, even after 4 hours of soaking, but overnight the color darkened.
- If the pieces of the ingredients are not finely chopped, you may need to use cheesecloth to help strain the particles out of the dye before using it on your eggs.
- White eggs work best! Sometimes I accidentally grab brown eggs by habit. You can dye them, but they’ll typically take on a more muted color once they’ve been dyed. If you’re looking for vibrant, jewel-toned eggs, be sure to grab white ones.
- Allow your eggs to dry completely. Once they are dry, you can rub them with a bit of vegetable oil to give them a nice shine like a river stone that’s absolutely gorgeous.
Easter Egg Safety Tips
These eggs are so gorgeous that you’ll want to keep them on display, but make sure to refrigerate them if you plan on eating them! so they don’t spoil!
They’ll keep safely in the refrigerator for up to 1 week. Eggs should not be left out of the refrigerator for more than two hours.
If you accidentally crack any egg shells when dropping the egg into the cup of dye, throw that egg away.
How to Make Easter Egg Dye from Kitchen Scraps
Ingredients
- 12 Hard boiled eggs
- 2 fresh beets peeled and sliced or 1 cup beet juice
- 1 small red cabbage shredded
- 2 tablespoons Turmeric
- 2 tablespoons loose hibiscus tea
- 1 bunch fresh parsley
- 1 tablespoon distilled white vinegar
- 1-2 tablespoons vegetable oil optional
Instructions
- For each color you want to make, pour 1 cup of water into a small saucepan.
- Add the ingredients to make your desired color(s) and bring to boil. Reduce the heat to low and simmer for 15-30 minutes, or until the liquid is a few shades darker than you want the color of your eggs to be.
- Remove the pan(s) from the stove and allow to cool to room temperature. Strain the dye using a fine mesh strainer to remove the solids. Stir in the vinegar.
- Transfer dye into coffee cups, mason jars, or other vessels suitable for dying an egg.
- Add eggs and allow to sit until the desired color. Remove from the dye and place on a wire rack or paper towel to dry.
- For extra shine, rub the dried egg with a paper towel dipped in oil.