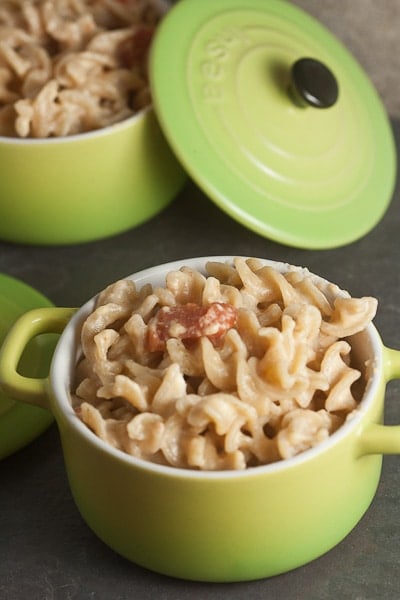
Monthly Archives: March 2012

Olive and Goat Cheese Croustades & My Photography Process

Over the past year or so, a lot of people have asked me to post about my photography “process.” I usually laugh them off. I love food photography, but I’m by no means a photographer. I’ve never taken a photography class and most of the time I feel like when I get a good shot, it’s because of nothing but luck. Still, when you compare the photos that I take now to the ones that I took when I first started the blog, even I have to admit that there’s been a dramatic improvement. (For reference, this is the first photo I posted. Yikes!)

Lindsay Olives recently asked me to do some recipe photography for their web site, so I figure now is as good a time as any for that photography post…

Equipment: Since everyone like to hear about the “toys” I’ll start there.

  • I shoot with a Canon Rebel XS.  The camera is ok. It’s the most basic of entry level SLRs and I kind of wish I had done more research and bought something that I could grow into a little more. (That being said, I’m not sure that research really would have changed my mind. Right now I’m longing for a full frame camera, but those don’t come cheap. For now, the camera on my iPad is a good approximation. Don’t underestimate small cameras – the photo above was actually taken with an iPad!)
  • Until recently, I mainly used this 50mm lens. It’s small, cheap, and works really well in low light.
  • More recently, I purchased this 100mm macro lens. I’m not going to lie – it was a big investment! I had been lusting after this lens for years before I finally took the plunge, but I’m so glad that I did. I absolutely LOVE it, and I can’t get over how crisp the images it captures are. The only problem with it is that it’s really heavy, so I have to use a tripod if I’m shooting at anything more than the lowest aperture.
  • Since my house is nearly pitch black even in the middle of a summer afternoon and my overhead lights give photographs a strange color, I use an EGO light unless I’m able to shoot outside in natural light (in the winter it’s dark out before I get home, so EGO light it is!). Since my lighting situation is so funky, I always use a custom white balance and I shoot in RAW so that I can adjust the colors in Lightroom if needed.


Composition: Of course, even the fanciest equipment won’t guarantee that you take a gorgeous photo. I’ve seen people take better pictures with camera phones than I can dream to take in a million years. That part comes down to composition, and it’s really an art.

My best photos are the ones where I’ve put some thought into to composition and what kind of story I want to tell. Do I want the photo to be light and bright? Dark and moody? Elegant or casual? Those questions help me determine what kind of dish I want to showcase the food on – or if I want it to be on a dish at all! It also helps me pick out a color for the backdrop or linens that I use. For a simple look, I usually use white, natural wood, or pick up a color that occurs in the food naturally. For something with more drama, I pick something from the opposite side of the color wheel.

  • From there, I take a few test shots with each lens and decide if I need to add more props to fill in the scene, or if I need to take some away. In the croustades above, I didn’t like the way that the edge of the plate was getting in my way (it’s always difficult to photograph flat foods) so I ended up putting them directly on the placemat.
  • I usually try to take at least one close-up shot, one short that’s farther back but is pretty empty, and one shot with another plate, raw ingredients, or some other prop in the background. I do that with both lenses.

Props: I definitely go through phases in how styled I like my photos to look and what colors I like to use in them. I always keep my eyes open for new linens and props – and for new ways to use old ones (the “stands” in this photo are upside-down teacups topped with a saucer). Some of my favorite places to shop are Goodwill, Marshall’s/Homegoods, Pier I, Target, and the local Asian supermarket (they have a whole aisle of gorgeous plates that are dirt-cheap). I also love Anthropologie, but their stuff is generally way too expensive. Tiles and wood panels from Home Depot make great backdrops, too!

Processing: Finally, I export my photos into Lightroom (possibly the best $100 I ever spent!) where I make minor edits to adjust the white balance and increase the contrast and clarity. I try not to over edit the photos, but since I shoot in RAW they do need to be “developed” and look much better after a few tweaks.

So that’s it in a nutshell. But all that being said, I think the most helpful thing that I do is to keep practicing. Try something new, and don’t be scared of taking a “bad” picture. If you don’t like it, you can always delete it and try something else.

Blueberry Honey Cornmeal Muffins

It’s Secret Recipe Club time again! This month, I was paired up with Krissy from Krissy’s Creations. She has a beautiful blog full of tempting treats (Funfetti Waffles? Yes, please!)

Unfortunately, I wasn’t in the mood for sweets, so I searched for a savory recipe to make an settled on these blueberry-honey cornmeal muffins. We had some beautiful weather last week (with highs near the 80s!) and I made these muffins the cornerstone of a summertime-inspired meal of we ate them with barbecue chicken, grilled asparagus, and potato salad.  I really loved the contrast of the slightly sweet muffins with the smokey, barbecue flavors.

I was really surprised by how easy they were to make! It only took about 5 minutes to mix up the batter and then 20 minutes in the oven. They also didn’t call for any fancy ingredients – with the exception of the blueberries, I already had everything that I needed to make them.

The muffins had a coarse, gritty texture (more like cornbread than a more delicate corn muffin). They were dry, but the blueberries added pockets of moisture. They’re fabulous drizzled with more honey or spread with butter.


Stovetop Mac & Cheese with Stewed Tomato

Last month, The Laughing Cow asked me if I would be interested in trying a lower-calorie version of a comfort food, featuring their cheese. I’ve kept Laughing Cow in my refrigerator ever since being introduced to it by my high school French teacher (back when it was called “la vache qui rit”) but I’ve never tried cooking with it so, intrigued, I agreed. They sent me the recipe and ingredients to make their creamy stovetop macaroni and cheese, and it couldn’t have been more perfect.

It’s no secret that I have a soft spot for macaroni and cheese, especially when it has a gourmet twist (Jalapeño Popper is my most popular version, but my personal favorite is Pulled Pork Mac and Cheese.) Sometimes though you just need something simple, quick, and comforting. That’s exactly what this recipe delivers. It doesn’t take any longer to make than a standard box does, but the combination of Swiss and cheddar cheeses gives it a really complex, adult flavor.

I thought about putting a crazy, gourmet twist on the recipe but in the end I went with classic comfort and stirred in some stewed tomatoes. It’s something my Dad always did, and the combination always reminds me of being a kid. (For some reason, it also reminds me of eating cream cheese and jelly sandwiches – did anyone else eat those?! I can’t even imagine eating one of those now…)

Disclosure: The Laughing Cow sent me the ingredients and a recipe for mac n’cheese but I did not receive any additional compensation for this post. All opinions are my own. 

Oatmeal Cookies with Whiskey-Soaked Cherries


Soft, chewy oatmeal cookies studded with chocolate chips and dried cherries re-plumped with whiskey… what more is there to say?!

These are, hands down, my new favorite cookies. I generally hate whiskey (it tastes like pencils), but butter and brown sugar mellow out the flavor, leaving these cookies with a complex, butterscotch-like flavor that’s perfectly balanced by sour cherries and sweet chocolate. A touch of coconut* helps keep them soft, and I think they have an even better flavor the next day, after the flavors have had a chance to meld.

Unfortunately, my dogs seemed to agree. I originally made these late Wednesday night. I was so excited to share them with you for Saint Patrick’s Day, but I was too tired to take photos. So I made sure we saved most of them (believe me, it wasn’t easy!), planning to photograph them after work the next day. Imagine my surprise when Shawn sent me a text saying that not only had my tiny little the dogs managed to get the tupperware container of them off the kitchen counter, but that they had eaten every last crumb? I was crushed. (Thankfully, my dogs have stomachs of steel and are perfectly fine. Chocolate, booze and all.)

I didn’t have time to make another batch before the holiday, but it doesn’t matter. These cookies are great any time of year. This time, I know better than to leave them on the counter….

*It really is a tiny bit a coconut, and they don’t have a discernable coconut flavor at all. If you really hate the stuff though, or if you’re allergic, you can feel free to leave it out. The cookies just might not be as chewy the next day.

Cheddar & Ale Soup

If you have a second, I’m a finalist to win a scholarship to Eat, Write, Retreat and I’d really appreciate it if you vote for my pasta with cauliflower, prosciutto and peas. You don’t have to sign up or anything, just go to this link, click the button next to my recipe, and click “vote.” It would mean the world to me!

During my freshman year of college, there was a vegetarian station in my Quad’s dining hall. It was tucked away in the back corner, all the way on the other side of the seating area (God forbid there be any chance of Buffalo tempeh or curried lentils coming into contact with the pizzas or chicken patties served in the main section!). I honestly don’t think many students even noticed that it was there.

 I wasn’t even close to resembling a vegetarian, but I found myself eating there most nights (it was only open for dinner) because the food was actually good! Unlike the mainstream options, the food wasn’t super processed. And, thanks to their focus on international cuisine, it actually had flavor.

Ten years later, there are two dishes that stand out in my memory as being particularly fantastic: the Buffalo tempeh that I mentioned earlier and Vermont Cheddar Soup. Oh, that soup! My mouth still waters when I think about it.  I think Shawn had about three bowls of it – and it was a good thing he filled up when he had the chance, because we never saw it again. As far a I know, that was the one and only time it was served.
.
This cheddar and ale soup is my attempt at recreating, and improving on, that Vermont cheddar soup. Instead using cream, I thicken the soup with cauliflower puree, which adds almost no calories and boosts the amount of Vitamin C. Paprika and jalapeño add smoke and heat, giving the soup a warm depth. I also added some beer for good measure. After all, the recipe was inspired by college.

Baked Chicken and Spinach Flautas


Am I the only one who was craving flautas/taquitos after seeing this post on The Kitchn last week? They looked amazing!

We went through a phase a few years ago where we loved the frozen ones, but now they kind of weird me out so it’s been forever since I’ve had them. I’ve actually been meaning to experiment with a baked version for a while, but I never got around to it. When I saw their post though, I immediately changed my dinner plans. (Luckily I was already planning to make enchiladas, so it wasn’t that big of a switch and I had everything I needed). Of course, I had to put my own healthy spin on them….

You guys, these are so good. SO. GOOD. They’re really well seasoned (not spicy at all, but definitely not bland either) and baking them at a high temperatures leaves them nice and crispy without any greasiness. I even managed to sneak some vegetables into them. You should make them ASAP.

I was worried that the flautas wouldn’t be filling enough on their own, so I served them with some refried beans. They ended up not really needing the beans, but it was a nice tough to round out the meal.

We also mixed up some margaritas with Jose Cuervo Light Margarita Mix . We found it at the Christmas Tree Shop a few weeks ago and are tempted to go back and buy a few more bottles to save for the summer. It’s zero calories and totally delicious. Actually, I want to repeat this entire dinner again, right down to the last detail.


4.7 from 3 reviews

Baked Chicken and Spinach Flautas
 
Prep time

Cook time

Total time


Baked flautas stuffed with seasoned, shredded chicken, spinach, and cheese are crispy, but don’t have the greasiness of fried versions. To shred poached chicken easily, put it into the bowl of a stand mixer fitted with the paddle attachment and mix on medium for 45 seconds. Store-bought rotisserie chicken can be substituted for the poached chicken to save time. You might also like Baked Buffalo Chicken Taquitos.
Author:

Ingredients
  • 1 pound boneless, skinless Chicken Thighs (about 4)
  • 16 ounces Beer (or chicken broth)
  • 2 cups Water
  • 1 teaspoon Paprika
  • 1 teaspoon Kosher Salt
  • 1 teaspoon Garlic Powder
  • 1 teaspoon ground Cumin
  • 1 teaspoon Chili Powder
  • 1 Jalapeno Pepper, minced
  • 3 cups Baby Spinach, chopped
  • 5 burrito-size Flour Tortillas (9 inches)
  • 6 ounces Queso Quesadilla or other melting cheese, shredded
  • 1 teaspoon Olive Oil, or cooking spray
  • Salsa, for serving

Preparation
  1. Preheat the oven to 450*F.
  2. Put the chicken thighs in a deep sided saute pan and cover with the beer and water. Bring to a boil, then reduce heat and simmer for 10 minutes. Remove the chicken from the liquid and shred it. Mix together the chicken and seasonings.
  3. Pour out all but ¼ cup of the cooking liquid. Add the jalapeno and spinach and cook over low heat until for 2-3 minutes, or until the spinach is wilted.
  4. Cut the tortillas in half. Spoon 1/10th of the chicken (about 1 tablespoon) along the long edge of a tortilla. Repeat with the spinach and cheese. Roll the tortilla up, starting with the straight edge. Place seam-side down on an oiled baking sheet. Repeat with remaining tortillas.
  5. Brush the flautas with olive oil or spray with cooking spray. Bake for 10 minutes, then turn them over and bake for until 10 minutes, or until crispy. Serve with salsa.


Next Page »