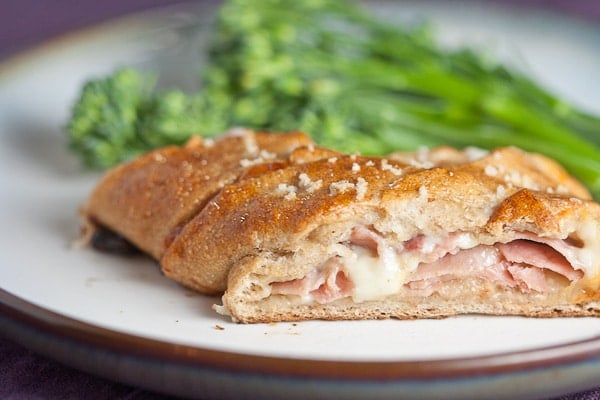
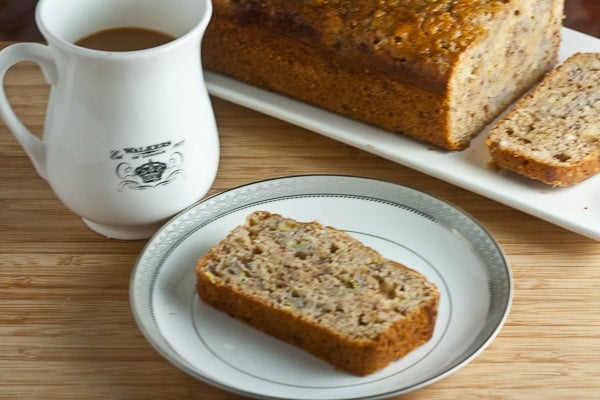
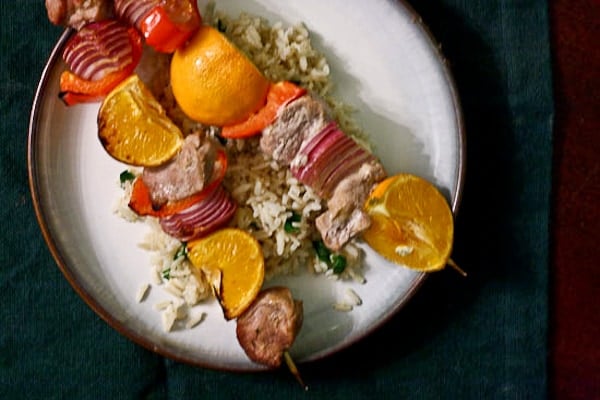
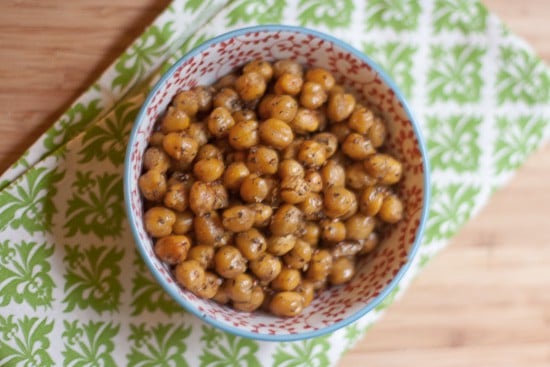
Monthly Archives: February 2012
Ham and Cheese Stuffed Pretzel Pockets & a Giveaway
| February 28, 2012 | Posted by Lauren Keating under Breads, Sandwiches, Shawn's Favorites |
Can I ask a favor? Can you vote for these ooey gooey ham and cheese stuffed pretzel pockets in the Saucy Mama recipe contest? Please? The grand prize is a spa day and, believe me, after the month I’ve had I can really use it. (VOTE HERE)
The recipe is totally delicious. The pretzels have that ballpark vendor “crisp on the outside, fluffy on the inside” thing going for them and, well, can you really ever go wrong with melted cheese? I didn’t think so. There’s mustard tucked inside there too. Yum!
In fact, they’re so delicious that I’m really glad I made them in single-serving form. The big loaf you see there? Way too easy to keep going back for another slice. And another. And another. Not that that’s the worst thing in the world, since it’s healthy and all. But still. (Oh did I forget to mention that they’re whole wheat? Because they are! And only 7 Weight Watchers Points!)
If you don’t believe me, go ahead and try them out for yourself. But don’t forget to vote for me. I could really use a massage. (There’s a comment about me wishing it was my shoulders being kneaded instead of the pretzel dough, but I’m too tired to make it coherently.)
Come back before March 7 and leave a comment letting me know you voted and I’ll enter you for a chance to win one bottle each of Saucy Mama Tarragon Lemon Mustard, Saucy Mama Smoky Garlic Mustard and Saucy Mama Dijon. (The Tarragon Lemon is fantastic in this recipe!)
Ham and Cheese Stuffed Pretzel Pockets
Yields 8 servings
Prep Time: 20 minutes
Total Time: 1 hour 30 minutesA cross between a soft pretzel and a grilled ham and cheese sandwich, these pretzel pockets are serious crowd-pleasers. Leftovers also make a great grab-and-go lunch – simply reheat in a toaster oven.
Vital wheat gluten keeps these pretzels light and fluffy on the inside, without sacrificing their crisp crust. Find it in your grocer’s baking aisle.
Ingredients
- 1 cup Warm Water
- 1 (1/4-ounce) envelope active dry Yeast (2 1/4 teaspoons)
- 1 Tablespoon Honey
- 1-1/4 cups All Purpose Flour
- 2-1/2 cups Whole Wheat Flour
- 2 tablespoons Vital Wheat Gluten
- 1 teaspoon Salt
- 4 tablespoons Saucy Mama Tarragon-Lemon or Dijon Mustard
- 1/2 pound Jarlsberg Light, or other reduced-fat Swiss cheese, shredded
- 1/4 pound Baked Ham, cut into thin strips
- 1 teaspoon Baking Powder
- 1 cup very hot Water
- 1 Egg White
- Coarse Salt, for sprinkling
Preparation
- Place the warm water and honey in the bowl of a stand mixer fitted with a dough hook. Sprinkle the yeast on top. Let rest 5 minutes.
- Meanwhile, sift together the flours, gluten, and 1 teaspoon salt. Add the flour mixture to the mixer and mix on a low setting to combine. Increase the speed to medium and mix the dough for 6 minutes, or until it becomes very smooth. For the dough into a ball and place it in a mixing bowl sprayed with cooking spray. Cover and let rest in a warm part of your kitchen for 30 minutes.
- Preheat oven to 415*F. Spray a baking sheet with cooking spray. Divide the dough into 8 balls. Working one at a time, roll each ball into a 6-inch circle. Spread with mustard, then top with ham and cheese. Fold the dough over to form a pocket around the fillings. Press along the edges to seal them.
- Combine the baking powder and hot water. Brush over the tops of the pretzel pockets. Let rest for 5 minutes. Brush the tops of the pretzel pockets with egg white and sprinkle with coarse salt. Bake for 30 minutes, or until the tops are deep, golden brown.
Approx. 280 calories, 5 grams fat, 39 grams carbohydrates, 2 grams fiber, 17 grams protein.
Earl Grey Banana Bread
| February 27, 2012 | Posted by Lauren Keating under Breads, Breakfast, Cake and Pastry, Desserts, Fruit |
Important Note to Google FriendConnect Subscribers: It has come to my attention that Google will be discontinuing it’s FriendConnect program as of March 1. If you subscribe via this service and would like to continue receiving updates from Healthy. Delicious., please subscribe via RSS or e-mail.
One of the downsides to trying to balance keeping up with recipe development jobs and making sure I have fresh content to post here is that I rarely have time to make recipes created by other people. (I’m not complaining – I love what I do and can’t get over the fact that big companies are actually willing pay me to play in the kitchen!)
Then I heard about the Secret Recipe Club, which pairs up bloggers each month and has them make, test, and write about another blogger’s recipe – meaning not only that I’d get to make something created by someone else, but I’d also get feedback on my recipes. Win-Win, right? Unfortunately, a lot of people agreed that it was a great concept – I’ve been on the waiting list for months. But I finally made it into a group, and I couldn’t be more excited!
For my first month participating in SRC, I was assigned to The More Than Occasional Baker. I considered making something sinfully decadent like Peanut Butter Toblerone Cheesecake (!!!) but ultimately settled on the Earl Grey Banana Bread. What can I say? I’ve been searching for a better banana bread recipe, and I adore Earl Grey.
This recipe is definitely a keeper! It’s light and fluffy, but also super moist – it’s totally not the kind of banana bread that requires a smear of butter to make it edible. The tea flavor is subtle, but it adds a really interesting layer of flavor that I loved. Same for the brown sugar, which adds slight caramel notes, and the turbinado sugar on top, which gives the crust a sticky toffee-like crunch.
All in all, this is a great bread to either grab for a quick breakfast or to enjoy mid-afternoon with a mug of tea.
Earl Grey Banana Bread
Yields 16 servings
Prep Time: 10 minutes; Total Time: 1 hour 30 minutes
If you like your bread to have a delicate, uniform crumb, you use a food processor or egg beaters to process the banana into a smooth puree. I prefer to mash my bananas with a fork, leaving them slightly chunky – you’ll end up with small pockets of intense banana flavor throughout the bread.
Adapted from The More than Occasional Baker
Ingredients
- 1/2 cup Water
- 5 bags of Earl Grey tea
- 1/4 cup packed Dark Brown Sugar
- 3/4 cup Sugar
- 1/2 cup Butter
- 1 cup fat free Sour Cream
- 1 teaspoon Baking Soda
- 2 Eggs, lightly beaten
- 2-1/4 cups all purpose Flour
- 3 very ripe Bananas, mashed
- 2 tablespoons Turbinado Sugar (Sugar in the Raw)
Preparation
- Preheat the oven to 350*F.
- Bring the water to a boil in a small saucepan. Remove from heat and add the tea bags. Allow the tea to steep for 5 minutes, then discard the tea bags. Add the sugars and butter and return the pan to the heat. Cook until the butter and sugars have melted into a thick syrup, about 2 minutes. Let cool.
- Combine the sour cream and baking soda in a large bowl. Let stand for 5 minutes. Stir in the cooled tea syrup and the eggs. Sift in the flour and fold gently to combine. Fold in the mashed bananas.
- Pour the batter into two greased loaf pans. Sprinkle the tops with turbinado sugar.
- Bake for 1 hour and 15 minutes, or until a toothpick inserted into the center of the bread comes out clean. Allow to cool completely before slicing.
Check out some of the other posts from SRC members after the jump!
(more…)
Tandoori Chicken Salad {Lactose Free!}
| February 23, 2012 | Posted by Lauren Keating under Chicken and Poultry, Indian, Light, Salads, Sandwiches, special projects |
When Yoplait recently asked me if I would be interested in creating a few recipes using their new line of lactose-free yogurt, and I immediately told them that I was, and that I’d love to make this salad. I used to make it all time time – in fact, I used to make tandoori chicken for the sole purpose of having leftovers to use in this tandoori chicken salad – but somehow I let it fall of my radar completely. It’s actually been 6 years since I had it last! (I distinctly remember that I ate it in a pita while sitting on my balcony and writing a paper for grad school.)
Anyway, I was really excited that I remembered it existed, but I unfortunately jumped the gun a little by assuming that the yogurt was available in plain. (I should have realized there would be a catch, since they specifically mentioned that they were interested in savory recipes!).
After stressing out way too much over what I was going to do – I had, after all committed to making the salad – I decided to give it a try with peach yogurt. It worked perfectly! The combination might seem strange at first, but if you think about it, peach is similar in flavor to mango and you wouldn’t think twice about serving mango chutney with curry. The sweetness of the peach is perfectly balanced by the spicy curry. It’s definitely a fun twist on the original. (Of course, it’s still delicious made with plain yogurt too.)
Tandoori Chicken Salad {Lactose Free!}
Yields 4 servings
Prep Time: 10 minutes
Total Time: 30 minutesThe marinated and baked chicken is also delicious on it’s own. Make a double batch – serve it with rice and spinach one night, then make the salad with the leftovers!
If you’re lactose intolerant, be sure to double-check the label on your pits bread. While most doesn’t contain lactose, some (to my surprise!) does. You can also make your own.
Ingredients
- 2 containers (6 oz each) Yoplait Lactose Free Peach Yogurt, divided
- 1 tablespoon Paprika
- 2 tablespoons Curry Powder, divided
- 2 teaspoons freshly grated Ginger
- 1 clove Garlic, minced
- 1 teaspoon ground Coriander
- Juice from 2 Lemons, divided
- 1/2 lb boneless, skinless Chicken Breasts
- 2 ribs Celery, chopped
- 2 tablespoons chopped Onion
- 1 teaspoon Cumin
- fresh Cilantro
- Pita Wedges, for serving
Preparation
- Combine 1-1/2 containers of yogurt, paprika, 1 tablespoon curry powder, ginger, garlic, coriander and juice from 1 lemon in a large bowl. Add the chicken breasts and turn several time to coat with the marinade. Cover and let marinate for a least 10 minutes or refrigerate and let marinate overnight.
- Preheat the oven to 400F. Place the chicken on a baking sheet and discard excess marinade. Bake the chicken for 30 minutes, or until cooked through. Allow to cool.
- Cut the chicken into bite-sized cubes and place in a large bowl. Add the celery, onion, cumin, 1/2 container of yogurt, 1 tablespoon curry powder, and remaining lemon juice. Mix to combine. Add cilantro to taste.
- Serve with pita wedges.
This post was sponsored by General Mills/ Yoplait. I purchased the yogurt myself but was compensated for creating the recipe.
Caribbean Pork and Clementine Kebabs
| February 20, 2012 | Posted by Lauren Keating under Beef, Lamb, and Pork, Light, Quick Weeknight Meals, Winter |
Inspired by the success of my Clementine-Soy Chicken Thighs, I’ve been looking for more ways to incorporate clementines into savory dishes. In this recipe, the sweet-tart fruit combines beautifully with rum, brown sugar, and warm spices to make a glaze for grilled pork kebabs. Served with cilantro-lime rice, these are a quick and easy dinner that bring a little bit of summertime flair to the dead of winter.
(I can’t believe I’m posting a grilled recipe in February, but we’re having such a mild winter this year that it doesn’t make sense not to use it – usually the grill is buried under about 4 feet of snow this time of the year). If the weather where you are isn’t as gorgeous, the broiler in your oven will work just as well.)
Caribbean Pork and Clementine Kebabs
Yields 2 servings
Prep Time: 10 minutes
Total Time: 20 minutes, plus marinating time
This recipe is adapted from the Weight Watchers PointsPlus Cookbook, which I’ve had for a few years and which I really should cook from more often. The book appears to be out of print, but there are some used copies available on Amazon. All it took were a few tweaks to the seasonings and a slightly adjusted cooking time to make the recipe perfect.
If you’re using wooden skewers like the ones in the photo, be sure to soak them in water for at least an hour before cooking to help prevent them from catching on fire. Then keep a close eye on them while they’re on the grill. Or skip the fuss and just use metal skewers.
Ingredients
- 6 Clementines
- 2 tablespoons Rum
- 2 teaspoons Brown Sugar
- 2 teaspoons Cumin
- 1/2 teaspoon Coriander
- 1/4 teaspoon Crushed Red Pepper
- 1 tablespoon Olive Oil
- 1/2 pound Pork Tenderloin, cut into 2-inch cubes
- 1 Red Onion, cut into 8 wedges
- 1 Red Bell Pepper, cut into 2-inch pieces
Preparation
- Combine the juice from 3 clementines, rum, brown sugar, cumin, coriander, and crushed red pepper in a small saucepan set over medium heat. Simmer for 5 minutes, or until the sugar had melted and the liquid has reduced to a thin glaze. Remove from heat and whisk in the olive oil. Allow to cool.
- Transfer half the glaze to a bowl. Add the pork. Cover and let marinate for 20 minutes.
- Heat the grill to medium-high. Cut the remaining clementines into quarters. Thread clementine segments, pork, onion, and pepper onto skewers. Grill for 6 minutes, then baste with the remaining glaze. Turn the skewars and cook for another 4 to 6 minutes, or until the pork is cooked through.
Approx. 325 calories, 11.5 grams fat, 1 grams carbohydrate, 2.5 grams fiber, 31.5 grams protein
Soba Noodles with Sautéed Chicken, Mushrooms, and Spinach in Cream Sauce
| February 12, 2012 | Posted by Lauren Keating under Chicken and Poultry, Pasta and Noodles, Quick Weeknight Meals |
This recipe didn’t come out at all how I had planned for it to. I was expecting a delicate, milky sauce. Something almost chowder-like.
Instead, I took a bite and thought to myself… “I’ve had this before. But what on earth is it?” The taste was so familiar, but I couldn’t place it. I just kept thinking of college. Then it dawned on me – it tasted almost exactly like I remember Knorr/Lipton Alfredo Noodles tasting. You know the kind that come dehydrated in the little paper packet? I practically lived on them in college since they were cheap, easy, and could be made in a microwave. Of course this dish is way less processed and much more nutritious. It’s kind of funny how things like that work out.
Soba Noodles with Sautéed Chicken, Mushrooms, and Spinach in Cream Sauce
Yields 4 servings
Prep Time: 10 minutes; Total Time: 30 minutes
I took a slight departure from my usual olive oil and sautéed the chicken and vegetables in butter – I had forgotten how beautifully golden and subtly sweet that makes everything. Olive oil is good, but I need more butter in my ife.
I used fat free half and half since it’s what I had on hand, but milk or cream would work just as well.
Ingredients
- 2 tablespoons unsalted Butter, divided
- 2 boneless, skinless Chicken Breasts (about 1/2 pound total), sliced
- 6 ounces White Mushrooms, quartered
- 1 Onion, chopped
- 1 clove Garlic, minced
- 1 tablespoon Flour
- 3/4 cup Chicken Stock
- 3/4 cup Fat Free Half and Half
- 1 tablespoon chopped Rosemary
- 1 teaspoon chopped Thyme
- 1/2 package (about 6 ounces) Soba (Buckwheat) Noodles
- 2 cups Baby Spinach, chopped
Preparation
- Bring a large pot of water to a boil.
- While the water is boiling, melt 1 tablespoon butter in a 9-inch sauté pan set over medium heat. When the butter begins to sizzle and brown, add the chicken. Cook the chicken for 3 minutes on each side, or until golden brown. Remove chicken from the pan and set aside.
- Return the pan to the burner and add the remaining butter. When the butter is melted, add the mushrooms, onions, and garlic. Cook for 5 minutes, or until mushrooms are golden brown and onion is soft. Sprinkle with flour and cook for one minute. Add the stock, half and half, rosemary, and thyme. Stir in the chicken. Simmer for 5 minutes, but do not allow it to boil.
- Add the soba noodles to the boiling water and cook for 3 minutes (or as directed on the package). Drain and return to the pot.
- Pour the saue over the noodles and add the spinach. Stir to combine. Let sit for 2 or 3 minutes so the spinach can wilt. Season to taste with salt and pepper.
Za’atar and Lemon Roast Chickpeas & a #GaiamTV Giveaway
| February 10, 2012 | Posted by Lauren Keating under special projects |
This is a Sponsored post written by me on behalf of Gaiam. All opinions are 100% mine.

When it comes to working out, I’m a classes kind of a girl. I can’t just go to the gym and do it on my own – I feel awkward and don’t really know what to do. Plus, even with an ipod loaded with great music, I find running to be completely boring. Classes keep me interested and never seem to get old – I especially love hula hooping, yoga, and dance classes. Unfortunately, class schedules don’t always work with my schedule. For some reason, places don’t like to schedule them after 6:00, which means if I’m working late, I probably won’t make it in time. Workout DVDs are good for filling in the gaps, but I get bored with them after 3 or 4 times (let alone sticking with them for the full 30 days that they usually say is needed to get results).
So when I heard about GaiamTV I thought it was a pretty cool idea – it’s basically like Netflix streaming for yoga and cardio classes. Unlike the classes at the gym, these are available 24/7 and can be accessed on the computer, ipad, and on Android systems. You can even customize workouts based on your goals – like losing weight, toning, or increasing energy. I signed up for a 10 day free trail last week, and it’s definitely made it easier for me to find time to get in a workout on busy days. The subscription is a little pricey at $9.95 per month, but if you think about it that’s way less than the gym and only the cost of about 1 yoga class at a studio.

Everyone can sign up for a free 10-day trial, but Gaiam is also giving away a free month subscription and a yoga mat so one of you can try it out for even longer. Simply leave a comment on this post or on another participating blog (see the full list in the contest rules) for a chance to win. And help spread the word by following @GaiamTV on Twitter and by sharing this post on your social networks with the hashtag #GaiamTV.

Za’atar and Lemon Roast Chickpeas
Yields 4 servings Prep Time: 10 minutes Total Time: 30 minutes
If you’re anything like me, you’ll be ready for a snack after your workout. Lately, I’ve been loving roast chickpeas – they’re crunchy and flavorful, and full of protein to help build and repair muscle and fiber to keep you full. Once you have the basic method down, there are countless ways to season them – za’atar and lemon is my favorite, but chili and lime is also great and cinnamon sugar makes a nice sweet treat. Some people roast their chickpeas dry and season them after. I like to season mine before. They take a little longer in the oven my way, but the flavor infuse the beans and bake right on to them. Go ahead and make a big batch – they’ll keep for several days in an airtight container.
Ingredients
- 1 can (15.9 ounce) Chickpeas
- 1 Tablespoon Olive Oil
- 1 Lemon, juiced
- 1 Tablespoon Za’atar (found in Mediterranean and gourmet shops)
Preparation
- Preheat the oven to 400*F.
- Rinse and drain the chickpeas .Pat dry with a towel and pour into a mixing bowl. Add the olive oil, lemon juice, and za’atar. Mix to combine, then spread the chickpeas in a single layer on a baking sheet.
- Roast the chickpeas, stirring occasionally, for an hour to a hour and a half, or until slightly crunchy.


Comments