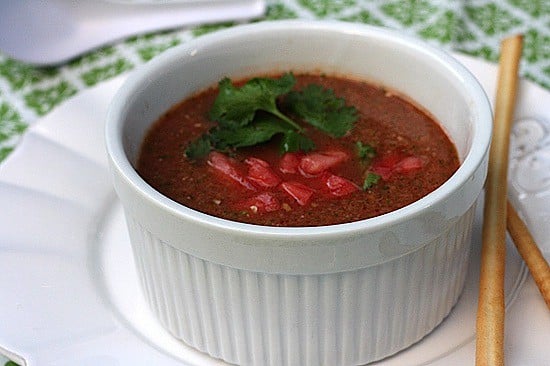
Monthly Archives: July 2011
Watermelon Gazpacho {No Tomatoes!}
| July 24, 2011 | Posted by Lauren Keating under Fruit, One Pan, Quick Weeknight Meals, Soups and Stews, Summer, Vegetarian or Vegan |

Like most of the country, New York has been suffering through a heat wave for the past week. Quite frankly, it’s too hot to cook or even to eat anything very substantial. For the first few days I was content eating salads for dinner, but after more than two or three days of salad I start to get cranky so I tried to think of something that would satisfy my raving for real food without requiring me to actually cook (since the 5 minutes I spent over the stove sautéing onions last night left me so hot that I couldn’t even enjoy the steak that Shawn grilled for me).
An ice-cold gazpacho seemed like it would hit the spot, but that suggestion was met with a resounding, “No way!” My effort to convince Shawn that gazpacho is basically just pureed salsa (the only way he’ll eat raw tomatoes) didn’t get me anywhere. Luckily, I had this recipe up my sleeve — a sightly spicy watermelon soup without a single tomato.

Loaded with cucumber and yellow bell pepper and enriched with an almond-cilantro pesto, this gazpacho doesn’t have the cloying sweetness of so many other fruit-based soups — you definitely won’t mistake it for dessert! Requiring little more than a blender and a refrigerator, it’s the perfect way to beat the summer heat. Serve it with a side of store-bought breadsticks for a satisfying dinner that even the staunchest tomato-hater will love.
This gazpacho is delicious on its own, but if you want to go crazy add a dash of angostura bitters or sherry peppers sauce to your bowl. You’ll be glad you did! It adds an extra dimension of flavor that takes this soup from great to out-of-this-world.

Watermelon Gazpacho
Prep time: 15 Minutes; Chill time: 1 Hour
Yield: 4 Servings
- 3 pound Watermelon, peeled and cut into 1-2 inch cubes
- 1 Cucumber, peeled and chopped
- 1 Yellow Bell Pepper, seeded
- 1/4 cup fresh Cilantro
- 12 raw/unroasted Almonds
- 1 Jalapeno, roughly chopped
- 1 Tbs. Olive Oil
- 1 Lime, juiced
- Black Pepper, to taste
- Bitters or Sherry Peppers Sauce plus additional watermelon for garnish, if desired
Add the watermelon and cucumber to a food processor or blender, working in batches if needed. Blend until smooth — about 30 seconds in a food processor.
Set a mesh strainer over a large bowl. Pour the watermelon and cucumber puree through the strainer to remove the seeds. Press down gently to extract as much liquid as possible — don’t worry if some pulp seeps through.
Add the pepper, cilantro, almonds, jalapeno, and about 1 cup of your strained liquid back into the food processor/blender. Blend until a smooth pesto forms — about 1 minute. Stir the pesto into the reserved soup base. Whisk in the olive oil and lime juice. Season with black pepper.
Chill at least 1 hour or until ready to serve.
If desired, garnish with additional diced watermelon and chopped cilantro. Allow each diner to season their bowl with bitters or sherry peppers sauce.
****
Congratulations to the winner of my Back to the Roots giveaway, Kristen! I’ll be emailing you to get your shipping info. For those of you that didn’t win, don’t forget about the 10% off code (mushrooms4me10). Check out how great my little garden is doing! I can’t wait to cook them up… they have about 5 more days to grow and are at the stage where they double in size every day (I can literally see them getting bigger over the course of the day. It’s amazing!)

****
I’m submitting this post to Souper Sunday and Wanderfood Wednesday.
Thursday Giveaway: Grow Your Own Mushroom Garden
| July 21, 2011 | Posted by Lauren Keating under Reviews |

Note: This contest is now closed. Congratulations to Kristen, who loves using mushrooms in stroganoff (I do too!).
I have to admit that I was a little apprehensive when I was contacted about doing a review and giveaway of Back to the Roots Grow Your Own Mushroom Kits. While I love the idea of gardening, I definitely do not have a green thumb (except when I try to grow habaneros and end up with enough to last a lifetime). And something about growing mushrooms in the house weirds me out a little bit (I mean, it sounds like something you don’t want to grow).
But the more I read about this company, the more I started to think that it was really cool. It was started by two friends in their senior year of college who were inspired by a lecture about the ability to grow gourmet mushrooms in recycled coffee grounds. The soil inside these kits is actually 100% recycled Peet’s coffee, and they’re on track to reuse over 1 million pounds of coffee grounds this year – helping families grow over 250,000 pounds of fresh oyster mushrooms (up to a pound and a half of mushrooms per kit).
The other thing that I think is really cool is that if you take a photo of your mushroom crop and post it on their Facebook wall, they’ll donate a kit to the classroom of your choice. What a fun and cool way to get kids interested in food and science!
So despite my initial hesitations, I was really intrigued by what these folks were doing. After being reassured that growing my own mushrooms would be foolproof (and that there was no risk of the kit growing any unwanted molds) I said ok!
My mushrooms are growing now and are doing wonderfully – I should be able to harvest them in a few days. The kit really did make it fool proof – they even included a little spray bottle to help you mist them as they grow. I can’t wait to come up with a delicious recipe using my mushrooms and get my second crop growing (each box can produce 2-4 crops).
Do you want to try your hand at growing mushrooms too? They’ve generously offered to send one of my US readers their very own kit. To enter, all you have to do is leave a comment on this post telling me your favorite way to use fresh mushrooms. For an extra entry, “like” Back to the Roots on Facebook and leave a second comment letting me know that you did. I will pick a winner on Sunday, August 24.
If you don’t win or if you simple can’t wait any long to try growing your own mushrooms you can use the code mushrooms4me10 for 10% off. Grow Your Own Mushroom Garden Kits retail for $19.95 and replacement bags retail for $7.99. They can be purchased at TheMushroomKit.com and at Whole Foods.
FTC Disclosure: I received a Mushroom Kit to review for free. All opinions are my own.
Peach Cobbler Pancakes
| July 20, 2011 | Posted by Lauren Keating under Breakfast, Fruit, Shawn's Favorites, Summer |


Before we get to the recipe, just take a look at that butter. How have they never thought of this before?! I’m pretty much obsessed with this stuff. A touch of oil blended in with the cream means that its always the perfect texture for spreading. I’ve been putting it on everything from toast to carrots to sweet potato latkes. I also think it would make a killer buttercream frosting. It’s a little pricey (about $2.30 for what ends up being the equivalent of a little less than two sticks of butter) but you can like them on Facebook or follow them on Twitter to be notified of available coupons and get more recipes.
Speaking of coupons, if you signup for the Land O’Lakes Rewards Plan you’ll get a coupon for 75 cents off — which thanks to Price Choppers new coupon doubling policy means you can get some of this cinnamon sugar goodness for about 80 cents. Sweet!

Prep time: 5 minutes, Total time: 20 minutes
Yield: 6 servings
- 2 cups Whole Wheat Flour
- 3 Tbs Sugar
- 1 tsp. Salt
- 2 Tbs. Baking Powder
- 4 Tbs. Land O’Lakes Cinnamon Sugar Butter Spread, separated
- 1 large Egg, beaten
- 2 cups Milk
- 1 tsp. Vanilla Extract
- 3 Peaches, peeled and sliced
- Optional: Land O’Lakes Cinnamon Sugar Butter Spread and maple syrup for serving
Combine the flour, sugar, salt, and baking powder in a mixing bowl.
Melt 2 tablespoons of butter in a large skillet. Add the melted butter, egg, milk, and vanilla to the dry ingredients. Stir gently, being careful not to over mix the batter — it’s okay if it’s a little lumpy!
Add the remaining butter and peaches to a pot set over medium heat. Cover and allow the peaches to stew while you cook the pancakes.
Heat a lightly greased skillet or griddle over medium heat until small drops of water splashed onto the pan sizzle. For each pancake, spoon 2 tablespoons of batter into a small circle. Cook until bubbles form and the surface of each pancake starts to look dry (2-3 minutes). Flip and cook until the other side is browned (1-2 minutes).
Layer stacks of three pancakes with the stewed peaches. Top with additional cinnamon sugar butter spread and maple syrup, if desired.
Tip: For extra-fluffy pancakes, separate the egg yolk from the white. Add the yolk along with the other wet ingredients as in the original recipe. Use a hand mixer to beat the white until it is thick and foamy and holds a stiff peak (about 3 minutes). Gently fold the beaten white into the pancake batter just prior to cooking.
FTC Disclosure: Although I purchased the butter spread myself, I was compensated for developing this recipe which is being featured on the Betty Crocker web site. All product opinions are my own and, as always, all recipes are original.
Sweet Potato Flatbread with Goat Cheese and Pancetta
| July 10, 2011 | Posted by Lauren Keating under Breads, Light, Quick Weeknight Meals, Summer |

This recipe was created to satisfy a random sweet potato craving that I had a few weeks ago (I blame Heather). I wanted something more interesting than a simple baked potato or fries, but I also didn’t want something that would remind me of Thanksgiving dinner. After playing around with a few ideas, I decided to experiment with a pizza-like flatbread. It was a great decision! The thin slices of sweet potato has an amazing texture — crispy like chips around the edges but with a soft, chewy center that reminded me of fruit leather. The combination of those potatoes with sweet caramelized onion, salty pancetta, and creamy goat cheese was one of the most amazing flavor and texture combinations that I’ve ever experienced. It definitely hit the spot and satisfied my craving. The only problem is that now I crave the flatbread!

I used the OXO Mandolin that I won at Eat, Write, Retreat to shave my sweet potato and onion into super thin (1/8-inch) rounds. If you don’t have a mandolin, you can also use the slicing blade of a box grater or a sharp knife to cut the slices as thinly as you can. Whichever way you decide to do it, just make sure to watch your fingers!
Prepared pizza dough makes this recipe super quick to pull together My favorite is Portland Pie Beer Pizza Dough, which has a slightly malty flavor and a great, chewy texture. Of course, you can use your favorite prepared dough or make your own.

Sweet Potato Flatbread with Goat Cheese & Pancetta
Prep time: 10 minutes, Total time: 40 minutes
Yield: 12 pieces
- 1 prepared Pizza Dough, at room-temperature
- 2 ounces diced Pancetta
- 1 Tbs Butter
- 1 Vidalia Onion, sliced thinly
- 1 Sweet Potato/Yam*, sliced into 1/8-inch rounds
- 2 ounces Goat Cheese, crumbled
- 1 Tbs chopped Parsley
Preheat oven to 350.
Add the pancetta to a large skillet set over medium heat. Cook until the outside edges are just crisp — 7-10 minutes. Remove the pancetta from the pan, leaving behind the rendered drippings. Add the butter to the pan. Once the butter has melted, add the onions and reduce the heat to low. Cook, stirring occasionally, until the onions are soft and golden brown — about 10 minutes.
Stretch the pizza dough to cover a 9X11 inch cookie sheet. Spread the caramelized onions and any remaining oil from the pan in an even layer across the dough. Top the onion layer with a layer of sweet potato. Sprinkle the pancetta and goat cheese over the flatbread.
Bake for 15 minutes, or until the dough is cooked though and the edges of the potatoes are crispy. Remove from the oven and sprinkle with chopped parsley.
Cut into 12 pieces and serve warm.
*Sweet Potatoes and Yams can be tricky. You want the orange ones, which (in the US) should be labelled as both. For more information (it’s actually pretty interesting) you can read more at this link.
****
I am participating in Goaterie, a challenge created by a few friends to explore the world of all things goat.


Comments