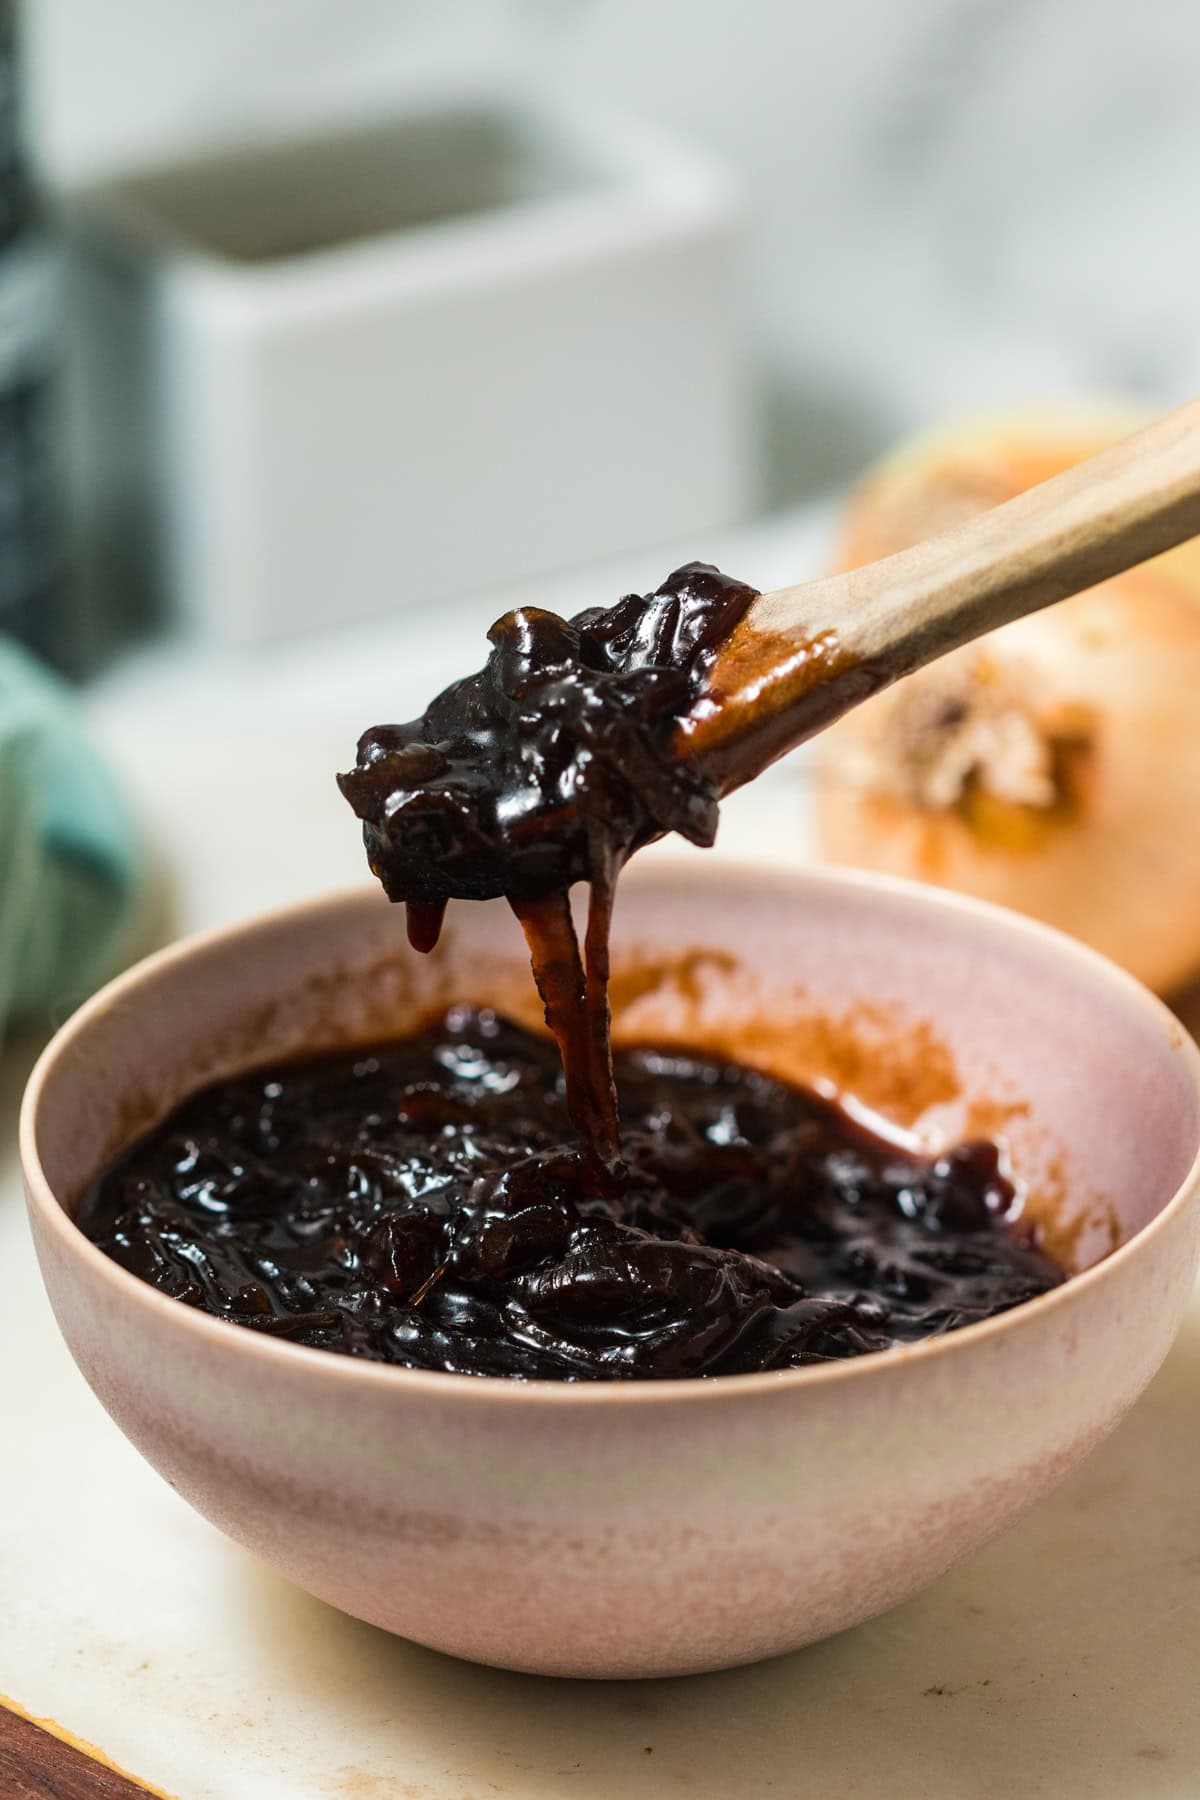
Monthly Archives: June 2009

4th of July Treats: Roquefurt Burger with Onion Jam, Mexican-Style Corn on the Cob

Can you believe that June is almost over already? I can’t! I have no idea where the first half of the year disappeared to! The Fourth of July is right around the corner and it took me by surprise – I’m totally unprepared for it! Just in case you are too, I’m doing my 4th of July post early. That way if you get inspired by it, you’ll still have time to go out and get the ingredients. ;)

Since no July 4th is complete without a backyard BBQ, here are two easy and delicious ideas that are a little more special than the normal hot dogs and hamburgers. They’re not as healthy as the things I normally post, but it is a holiday….

First up we have a burger stuffed with Roquefort and topped with onion jam. Since you’re stuffing the burger with cheese, you can get away with using meat that’s a little leaner than you normally would for a burger. The cheese melts inside and keeps it from drying out.  Delicious. I tried to get a picture of the cheese oozing out of the center, but it didn’t come out very nicely so I’ll spare you.

A good trick to making burgers is to make a small indentation in the center- shape the raw meat almost like a red blood cell. That way, when the center puffs up as it cooks it won’t pull the sides in. You’re burger won’t shrink! Using this trick, its easy to make your burger the same size as the bun and avoid having to eat mouths full of plain bread.

One of my other backyard favorites is Mexican style corn on the cob. Doesn’t that look awesome? I stole this idea from a local taco restaurant,but it’s a really simple way to dress up your corn. Grill it in the husks (about 15 minutes should be long enough) then sprinkle with some chili powder and about 1 tsp of grated cotija cheese – just enough to add some delicious flavor, but not enough to actually taste spicy or cheesy.

What do you plan to eat on the 4th?

****

I’m submitting the burger to Souper Sunday at Kahakai Kitchen

Bacon Crusted Pork Chops with Turnip Puree and Squash

Last week, I received a beautiful new cookbook – Ricardo Larrivee’s Foods for Every Occasion -  from Angie at Sea Salt with Food. I’ve been drooling over it every since! This is really a wonderful book: tons of recipes that are exactly to my tastes, more gorgeous photographs than I can count, and fun text. I love it! Of course, I had to make something from it right away.

This recipe is from the chapter “Looks like they’re staying for dinner…”. The chapter is full of recipes that don’t require any fancy ingredients – basically meals that you can make on the fly with staple ingredients. I can always use more recipes like that, and this is definitely something that I almost always have everything on hand for. And it’s delicious. Like I’ve said before, what can be better than combining bacon with pork?

I wanted the pork to be the star of the show here, so I chose side dishes that are pretty mild but still flavorful – pureed turnip and grilled squash. I think turnip is very under used… the cashier actually had to ask me what it was in order to ring it up! To most people, turnip is something that it eaten once a year, at Thanksgiving. Even then, what most people think is turnip is actually rutabaga (also known as a “Swede” or a “yellow turnip”). Turnips are very mild, with a slightly peppery flavor. They’re delicious as a puree and compliment almost everything.

Bacon Crusted Pork Chops
Adapted from Meals for Every Occasion

  • 2 slices bacon, cut into small pieces
  • 1/2 cup homemade breadcrumbs (I used about 3″ of stale baguette)
  • 2 Tbs chives
  • 2 Tbs Dijon mustard
  • 1 Tbs honey
  • 2 boneless pork chops
  • salt and pepper

Preheat oven to 400. Line a baking sheet with parchment paper.

Chop bacon in food processor. add breadcrumbs and pulse a few times, until the texture is similar to stuffing. Mix in chives.

Combine mustard and honey to form a glaze. Brush onto pork chops. Season with salt and pepper. Press into breadcrumb mixture, coating all sides well. Using your hands, press bread into pork to secure it.Bake about 30 minutes, or until fully cooked. Allow to rest for at least 5 minutes before serving.

Serves 2.

Turnip Puree

  • 2 small turnips
  • 1 tsp butter
  • 1/4 cup skim milk
  • salt and pepper

Bring a large pot of water to a boil.

Peel turnips and cut them into 1-inch cubes. Boil turnips until tender – about 30 minutes. Drain and add to food processor. Process until smooth. Add butter and milk and pulse another 4 or 5 times to combine. Season with salt and pepper.

Serves 2.

****

Thanks to CG for the Hardworking Foodie Award and to Sarah for the One Lovely Blog Award! I’ll pass them on tomorrow. :)


And the Winners are….

Mo and Happy Cook! Please email your address to lk@healthy-delicious.com and I’ll get your coupons in the mail. Congrats!!

****
For your viewing pleasure, here are some photos that I took at the farmers market recently. Please forgive the lack of produce…. I took them a few weeks ago before it really started coming in. I’ll have to remember to bring the camera with me again!

Meat-Free Friday: Eggnog Ice Cream

Today is your last chance to win a free bag of Pop Chips! To enter, leave a comment HERE.

****

Eggnog in summer? Why not?

I’m going to make a confession here: I did not intend to make eggnog ice cream. I meant to make chai ice cream. However, silly me didn’t think that chai spices + egg custard would taste like eggnog! I’m not going to complain though because its actually really good. I love eggnog around the holidays, but I can only drink so much of it because its so rich and thick. As an ice cream, you get all of the good flavor without the thickness! It may not be the most seasonally appropriate flavor, but trust me… it works.

Eggnog Ice Cream

  • 1.5 cups heavy cream
  • 1.5 cups skim milk
  • 1/2 cup agave nectar
  • 1 vanilla bean, split
  • 1 cinnamon stick
  • 3 cloves
  • 3 allspice
  • dash cardamom
  • 1/2 tsp coarsely grated nutmeg
  • 4 egg yolks, beaten

Combine cream, milk, agave and vanilla bean in a medium saucepan. Tie remaining spices in cheesecloth and add to pan. Heat to about 175 degrees (just below boiling).Remove from heat and let flavors infuse for about 1 hour. Return to heat and bring back to 175 degrees. Remove vanilla bean and spice packet.

Ladle some of the heated cream mxture into the eggs, stirring constantly to prevent eggs from cooking. Add the egg-cream mixture back to the saucepan. Heat to about 180 degrees, stirring constantly. At this point, the mixture should coat the back of a spoon. Pour mixture into an ice bath to cool, then refrigerate for several hours.

Pour the custard into your ice cream maker and freeze according to manufacturer’s directions. after about 20 minutes, you will achieve the soft-serve consistency shown above. For a firmer ice cream, transfer to a separate container and freeze for at least 2 hours.

Yields approx. 1 pint.

Cocoa-Coffee Bison with Pomegranite Syrup and Fresh Fig

The inspiration for this meal came from all over the place: an episode of Iron Chef, a chocolate cake, a fridge full of Pom, bad cheese that forced me to repurpose my figs…. I honestly wasn’t sure how this would come together until it was on the plate, but it was wonderful. The flavors were very earthy and the sweetness of the cocoa and fig was balanced against the tartness of the pomegranate and coffee. I originally thought the sauce might seem like an afterthought, but it really brought everything together. It was also delicious on the potatoes that I served this with! There’s really not much more to say than that.

Fresh figs are pretty much my favorite food on earth, and I was so excited to see them at the grocery store. They weren’t labeled, but I grabbed a bunch anyway. Bad idea. They were expensive!! Worth every cent though. I roasted extra and I’m going to have them for breakfast tomorrow with greek yogurt. I can’t wait!

I originally wanted to use filet in this dish, but it was $20 a pound and I didn’t want to spend that much. Bison was half that price! If you haven’t tried it, bison is a great “intro” to game meats – the flavor isn’t very strong and its fairly easy to find in the grocery store. It’s also very lean and high in protein – each steak I used had only 2.5 grams of fat! Definitely a healthy option when it comes to red meat.

Cocoa-Coffee Bison with Pomegranate Syrup and Fresh Figs

  • 2 bison sirloin steaks
  • 2 tsp cocoa powder
  • 1 tsp instant espresso
  • 4 fresh figs
  • 1/2 tsp honey
  • 8 ounces pomegranate juice
  • 1 tsp brown sugar
  • 2 tsp butter

Combine cocoa and espresso. Rub into steaks, coating both sides. Let sit for 10 minutes.

Meanwhile, heat oven to 400. Cut figs in half and drizzle with honey. Roast 5 minutes or until tender and bursting with juice. Remove from oven and set aside.

Combine juice and sugar in a saucepan. Bring to a boil, then reduce heat. Simmer for 20 minutes or until reduced by about 3/4. Remove from heat – the liquid will become thick and syrupy.

Melt butter in a skillet over medium heat. When butter begin to foam, add steaks. Cook 5-7 minutes on each side, or until cooked to medium rare.

Serve steaks and figs drizzled with pomegranate syrup.

Serves 2.

Rosemary-Thyme and Chocolate Chip Breads + Giveaway!

I think artisan breads are one of the biggest rip offs. I always stop to look at them at the farmer’s market. They’re beautiful and tempting, but I know they’re not worth the $5+ price tag when I can make one at home for just a few cents.

 Breads can seem intimidating, but they really aren’t very difficult – especially if you use a “No Knead” method. Although this method requires some advance planning (it’ll need to rise all day), it only takes about 5 minutes of active prep time. The bread has a nice, delicate crumb and a complex, almost sourdough-like flavor. Once you have the basics down, it’s really easy to customize the loaves with different add-ins to come up with your own unique creation.

 The two breads here are from one batch of dough. I split it in half and then made one savory bread to serve with dinner and one sweet bread to have for breakfast. The savory bread has about 2 Tbs each of fresh rosemary and fresh time and is topped with salted sunflower seeds. This is one of the best combinations I’ve come up with – it’s absolutely amazing, especially served warm from the oven and topped with butter and sea salt.

 The sweet version has about ¼ cup of mini chocolate chips in it. This one was great toasted and spread with a little bit of almond butter. CG was nice sent me some individual packets of Barney Butter that are awesome. Each pack has 90 calories and is the perfect amount for 2 pieces of toast. I never have time to eat breakfast at home, and I loved how easy it was to just throw the individual packet in my bag so I could make my toast at work without having to lug around a whole jar of nut butter. I’ll definitely be buying some of these! (Thanks, CG!)

 Some of the recipes floating around for this are overly complicated, and require things like Dutch Ovens. I just form mine into boules and bake them right on my pizza stone and they come out great! Also, the rise-time doesn’t need to be exact. If you have time, mix it up in the morning and let it sit all day. If you’re not a morning person, mix it before you go to bed the night before. It’ll come out just as great! I usually mix mine in the mornings on the weekend and at night during the week.

 Basic No-Knead Bread

  • 2 cups AP flour
  • 1 cup whole white wheat flour
  • 3/4 teaspoon yeast
  • 1-1/4 teaspoon salt
  • 1-1/2 cups warm water

Optional:

  • 4 Tbs fresh herbs or ¼ cup mini chocolate chips for filling
  • 2 Tbs sunflower seeds for topping

 Mix all ingredients in a large bowl. You’ll be left with a wet (Mark Bittman calls it “shaggy”) dough. Cover with a towel and leave in a warm space in your kitchen for at least 6-8 hours.

 Set a baking pan filled with water on the bottom of your oven. Place pizza stone in the oven and heat to 450. Once oven is heated, allow it to heat an additional 15 minutes before putting bread in. While oven is preheating, divide the dough in half on a floured counter. Slightly flatten each half into a square. Sprinkle with your desired filling, then form into a round boule shape. Top with desired topping (if using) and sprtiz with cooking spray. Transfer to pizza stone and bake for about 40 minutes. Bread will be done when an instant-read thermometer reads 210.

 Remove from oven and let cool on a baking rack for 15 minutes before slicing.

 Each loaf will yield about 8 slices.

****
True to their word, flavored popchips are now available in stores (including Target for those of you who, like me, don’t have a Whole Foods or other “fancy” store around!)! They’ve also come out with two new flavors – sour cream & onion and cheddar – both of which are amazing. BBQ is still my favorite, but both of the new flavors are right up there too. As you know by my previous posts, we love these chips. But you don’t need to take my word on how good they are anymore, because I’m giving away 2 coupons for a free bag! Yes you read that right (and my husband is pouting because he wants me to keep the coupons for us.) To enter, simply leave me a comment. For an extra entry, follow me in the widget on the sidebar or blog about the contest and leave me a second comment. Leave your comment before 5pm EST on Friday, June 26. I’ll pick 2 winners using the random number generator and post them on Saturday morning. Good luck!

Next Page »